Monday, March 31, 2014

Playing Catch Up

I have a number of smaller projects that have crossed my craft table over the past month or two that I've never shared here on the blog.  Today's post is a random collection of some of those projects to show you what I've been up to.

You may recall the 
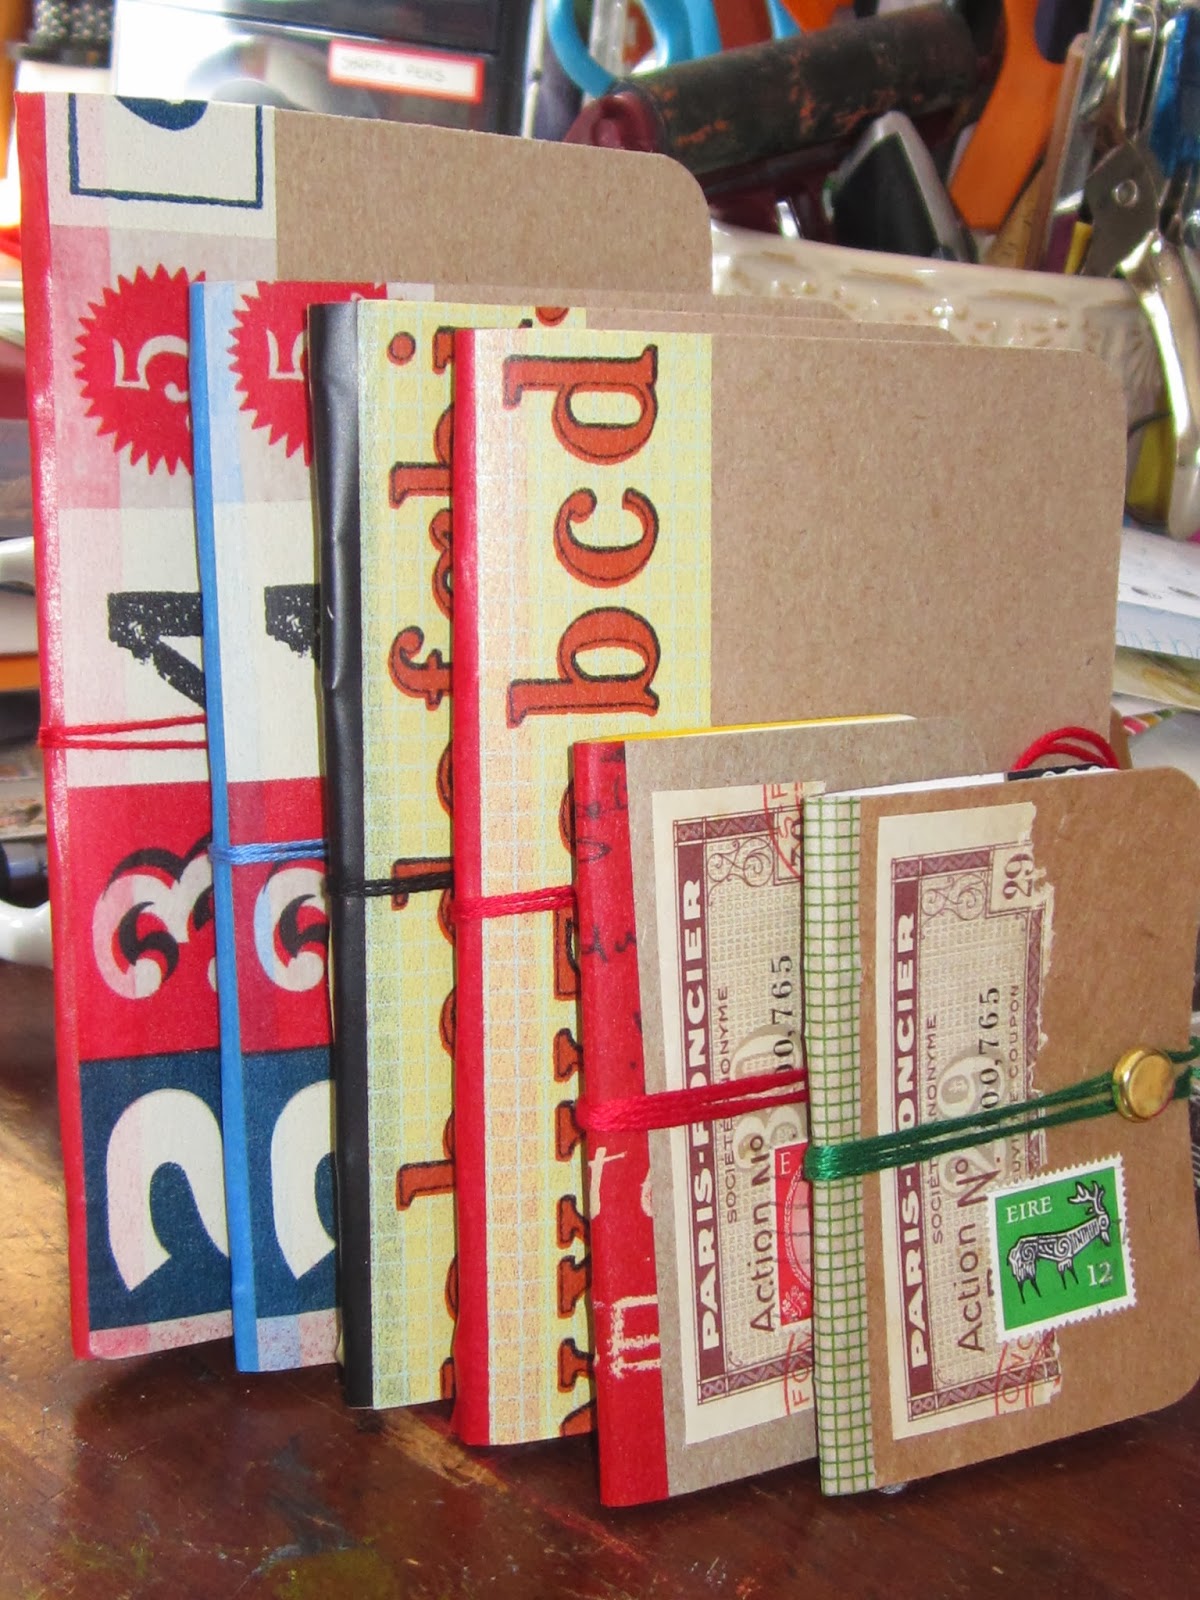
cereal box books I made based on a pin from my Pinterest Book and Journal Making boardAnother pin led me to make tiny little pocket notebooks using everyone's favorite shipping tags. 
The project is quick and easy, but the books are probably just a bit small to be practical for everyday use.
I did another version of the project with a final result that looks even cuter, but is unfortunately just as small and impractical!
I've never met a little notebook I didn't like, though, so I'm sure these will be put to some use!

********************************
Original on the left, photocopy on the right
Maybe I'm imagining things, but it seems like everyone is creating their own planner pages these days.  I love the "planner craze," though, and discovered an entire subculture of Filofax keepers once I started putting together my Daily/Weekly Plan Books board on Pinterest.
Original on the left, photocopy on the right
Just for fun, I created some 8-1/2"x11" weekly planning pages that could be used in a full-size binder (and I'm in the process of creating some smaller size pages for 6"x8" binder, which is my new favorite size).
Original on the left, photocopy on the right
I used watercolor paint and oil pastels on Bristol paper to create the originals.  Then I raided my collection of letter stickers from my scrapbooking days to identify the days of the week in different styles.
A closer look
The photocopied calendar pages are bright, smooth, and colorful.  I could definitely imagine having fun with them, though I have a smaller-sized planner that I'm committed to for the rest of this year.
I could imagine making these my daily planning pages!
It could be fun to create a kind "creative planner" to make sure that I am making time through each week for creative pursuits.  These colors would certainly be inspiring and eye-opening, don't you think?!
These fiery squares would wake me up to my To Dos in the morning!
********************************
And, finally, I've made some postcards from a stash of metallic papers I purchased awhile back from a craft store.
The snows of winter moved quickly into the cold rains of spring, so there haven't been too many bright cheerful colors to inspire me.  About the brightest I could come up with was metallic, which isn't generally a preferred look for me.
I thought the metallic papers gave a lovely haunting look to the postcards, though, especially the two I've posted here.
********************************
So, while I've been a little MIA around the blog, I haven't deserted my art room completely! I find myself spending more time on spring cleaning, church involvement, my Living Stones group, and the same old carting of the kids to school drop-off and pick-up.  I am hoping that if the warmer temperatures and longer days of sunshine DO finally arrive, they will bring with them some additional inspiration and motivation for art-making.  It has been a truly long, long winter!

Wednesday, March 19, 2014

The Strangest Art Tool Yet

As I was cutting celery sticks for my daughter's St. Patrick's Day class party (yes, I was "celery mom"; you know that must have gone over big), I remembered a trick I have read about dipping the cut end of the celery stalks into paint to get the effect of a painted rose.
I decided to give it a try, pouring a few shades of pink craft paint onto some palette paper, and dipping the celery right in.  So far, so pretty:
I dabbed the celery into lighter pink first, and then into a brighter pink, and spread them all over a piece of white Bristol paper to check out the effect:
Then I made a couple straight lines of celery prints onto another page:
I added black lines with a Sharpie pen to define the rose petals, painted a green background with watercolor paints, and flicked some white watercolor paint over it all to make it a little more interesting:
I am amazed by the creative design that went into making joined celery stalks look just like a rose.  Go, God!
I stamped a few ATCs while I was at it:
I added some dots and cross hatches and got some good graphic effects:
What's next:  carrots?  green pepper?  onion?  I might just have to raid my vegetable crisper drawer to find some more strange art tools!

Sunday, March 16, 2014

Living Stones

Since I was quite young, I have loved the Bible verse that says, "And you are living stones that God is building into His spiritual temple," which comes from 1 Peter 2:5.

I appreciated the unexpectedness of the image:  a stone that is alive.  I was drawn to the idea of other people being living stones alongside me.  I always thought I would one day write a book with the phrase living stones in the title, and I imaged that it would have something to do with the people in my life who have influenced and encouraged me spiritually.
Whether that book will happen or not remains to be seen, but in the meantime, I've started a ministry in my home, which I am calling the Living Stones Women's Ministry.  As soon as I thought of drawing these women together, I knew that Living Stones was exactly the right name for us!
Shortly after I made plans for the group, I had the idea that I wanted to decoupage spiritual and inspiring words on some smooth stones that I've collected on some recent beach visits.  I used gel medium and scraps from a vintage dictionary.
Before
I envision these as my own form of "living stones," as they offer words of life to those who read them.
After
I did a search for "Living Stones" on Pinterest, and found so many beautiful projects that people have done to illustrate, paint, image-transfer, engrave, and collage on smooth beach and river stones.  Check out my Pinterest board here!
Also, I would love for you to visit the blog, called Living Stones of course, that I am maintaining for the women's ministry; all are invited to visit often!

Thursday, March 6, 2014

Bayla's First Craft Tutorial: How to Make a Butterfly Present

My five-year-old Bayla has a developing understanding of the world of blogging...enough to create a project, and then request that I put it "on blog" so other people can learn how to make it, too!  When she made a special craft yesterday with supplies from my dear friend Mindy, I agreed to share her latest creation, complete with materials and steps.

In order to make your very own Butterfly Present, you will need the following:
+ A big pink pom pom
+ A small piece of chenille stem
+ Two golden brads
+ Two brown foam triangles
+ Two Q-tips
+ An egg carton
+ A ribbon
And here are the steps:
1.  Glue the piece of chenille stem to the pom pom for a mouth.  (Use the photo above as a guide.)
2.  Tuck in the golden brads to the pom pom for eyes.
3.  Glue the brown foam triangles to the pom pom for wings.
4.  Glue the Q-tips to the pom pom for antennae.
 
5.  Cut an egg carton in half.
6.  Put the butterfly in the egg carton and close it up.
7.  Tie the ribbon around the egg carton and make a bow.

Bayla made this present for her daddy, and Katy followed her directions to make a Pom Pom Butterfly, too.  The girls hope you will try this craft with your favorite kid soon! 

I know the girls would love to hear from you in the comments...what do you think of Bayla's first craft tutorial?

Saturday, March 1, 2014

That's Pinteresting!: Cereal Box Books

One of the ways I justify to myself all the time that I spend browsing on Pinterest is to make sure that I actually create some of the projects I pin.  One of my most recent efforts came from my Book and Journal Making board, where I pinned the DIY Cereal Box Notebooks and DIY Mini Pocket Notebooks from a Cereal Box created by Natalie at Crème de la Craft.
We go through cereal boxes like they're going out of style around here, so I have plenty of raw material to work with! 
The larger notebooks, which measure about 4 inches x 5-1/2 inches (though I made one that was slightly larger, too), require almost a whole side of a cereal box, while several of the smaller notebooks, which measure about 2-1/2 x 3-1/2 inches (adorable!), can be made from one box.  The size of the notebook is completely adjustable to your taste, though.
Natalie has all of the instructions you need for the project, so I won't reiterate the steps here; I'll just show you how cute all the little books came out so you will be motivated to dig out some cereal boxes from the recycling bin and have at it!
Instead of using scrapbook paper to cover the stitches in the spines, I used plastic-y electrical tape, and then prettied it up with decorative tapes from Cavallini.  (I thought the numbers and letters tapes looked appropriately school-like for my notebooks!)
Other than that, I think I followed Natalie's instructions exactly.  Using the corner-rounder punch, which she offered as an optional step, really did provide a much more finished professional look to each book.
And, of course, you could add any sort of rubber stamp, painted, drawn, or collaged decoration to the insides and/or outsides of the covers.  I left mine plain, for "cereal box chic."
The smaller notebooks are adorable, using a brad rather than a button for their closure. They are also super-simple, because you can use two staples to hold the paper in, rather than stitching with embroidery floss.  I didn't bother with electrical tape for these; I just used some decorative tape to cover up the staples on the spine. 
I collaged the covers with a piece of a vintage French coupon and a postage stamp.  I also made two Valentine-themed books for part of my daughters' Valentine's Day gifts.  The little ones have the round edges, too. 
These notebooks are seriously simple and fun to make, which make them a very satisfying project for someone like me, who enjoys pretty steady productivity!  Grab some empty cereal boxes and give it a try; I think you'll while away an evening before you know it.