Saturday, December 8, 2012

Christmas Quickie: Gift Tags

I recently bought myself a pretty orange sweater from Anthropologie, and it had the sweetest little jingle bell gift tag pinned to the front.  I knew I wanted to make my own version of their tags, and was happy to find all of the supplies I needed already in my stash. 
To create the tags, you need:
  1. a basic shipping tag (I used small-sized pre-cut white tags)
  2. a jingle bell (You can find a set of 12 for $1 at the dollar store, or at fun stores like Deals Variety Store in Media, PA)
  3. ribbon
  4. decorative punches
  5. letter stamps
The process is as easy as 1-2-3:

1.  First, I stamped the "To" and "From" with letter stamps. 

2.  Second, I punched the shapes in the lower right corner; I used a star, a Christmas tree, and a swirl.  With a larger tag, I would have loved to use my snowflake punches. 

3.  Third, I strung the jingle bell on the piece of ribbon and then strung it through the hole in the tag, securing it by tying the ribbon into a bow.
And that, my friends, is all there is to it!
I took photos of a bunch of objects on my work table "wearing" the gift tags, so that you can imagine them on the gifts under your Christmas tree!
My ribbon candy box is destined to become a duct tape journal cover!
A Christmas rubber stamp set from Pamela will be a gift that keeps on giving as I use it in many mail art projects to come.
I use the box from my Kelly Rae Roberts coffee mug to hold my index cards from Tammy's ICAD project.
The duct tape journal from my mom is a treasured gift.  I made a duct tape journal for each of my daughters, too, so they might just get a jingle bell on their books on Christmas morning.

Happy holidays!

Wednesday, December 5, 2012

Candy-Covered Christmas Creation

If anyone is going to entice me to start "pinning" over at Pinterest, it is my friend Melissa.  With three little girls under the age of 4, she has boards filled with creative ideas for decorating, cooking, and crafting with her kids.  Yesterday, my girls and I were lucky enough to participate in a holiday food craft extravaganza that she had pinned to one of her boards.  All I can say is, I cannot get the thought of smooth, delicious green frosting out my mind!
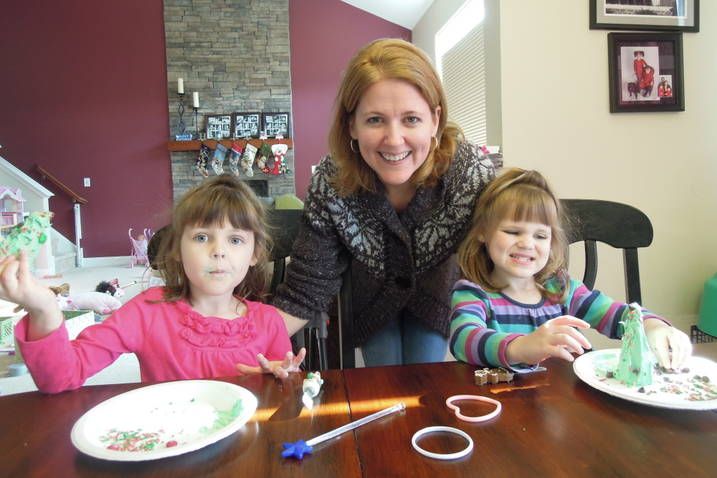
She created plates for each of our girls, filled with an ice cream cone, green frosting, holiday sprinkles, M&Ms, chocolate chips, and Gummy Bears.
The girls happily spread the green frosting on the cone to create their very own edible Christmas tree.
They used their candy as Christmas tree decorations, and then dug right in to eat it all up!
Trust me, as soon as the photo was taken, I was off to create an edible Christmas tree of my own!
Melissa's daughter Samantha (just three weeks older than my Bayla) discovered that a cone can make a very fun little telescope.
And two-year-old Olivia did a great job decorating her tree and licking her fingers, then showed remarkable restraint when she left the tree creation itself UNEATEN!
Here is Melissa with her older two girls.  Many thanks to my dear, creative, incredibly energetic friend for including us in this holiday fun.  Did I mention that she has a seven-month-old daughter besides?  Way to go, Mama!

If you have even the smallest bit of a sweet tooth, I highly recommend this candy-covered Christmas creation.  If you have a grandchild or a niece or nephew:  sure, you can pretend you are doing it all for them.  But don't hesitate to take a big bite out of that frosting-covered cone for yourself!

Happy holidays!

Monday, December 3, 2012

Open Studio Tour

Over the weekend, I enjoyed the Haverford Guild of Craftsmen Open Studio Tour. 

Though I worked for the School District of Haverford Township for nine years, I had no idea that this community was such a hotbed of artistry!  There were six studios on the tour, and all but one of them was located within a block or two of one another.  Each studio was in an artist's home, and additional artists (usually four or five) brought their work in to display and sell, as well.

It felt strange to walk right into someone's home and be ushered upstairs past kitchen cupboards and family photos and bedroom doors to find an art studio in their attic space! 

The first place had amazing mosaic work on the front porch, around the fireplace, and in the kitchen, but because it was someone's personal home and these areas weren't part of the tour, I didn't feel that I could go around snapping photos of their personal spaces!  I got a few shots out front, though, where surely no one would mind:
Look how they used toy cars and trucks as mosaic pieces on the front porch--love that!
This first location was the studio of Ilene Pearlman, who creates pictorial art quilts.  Her work was such fun to look at!  I took as many photos as I could because I knew I wanted to spend some more time exploring the details of her work once I was home.  Her web site has some photos of her work, as well, I was happy to discover.
Unfortunately, in my haste, I cropped the poor dog's nose!
I also loved the work of Sharon Bartmann who creates hand-built ceramics and raku.  I took several photos of her whimsical creations, as well, and you can check out her other work on her web site.
Most of the studio spaces had been transformed into display and sales areas, so some of the "studio feel" was lost in the process.  Murray Callahan, who creates hand painted frames and mirrors, left her entire work space intact and set up the items for sale in a separate area.   Happily, I could see her art-making space clearly--something I think we all like to get a look at!
I have seen references to Open Studio events on web sites before, but I guess it never occurred to me that there would be such an event near my own home!  I had two different friends tell me about the tour, both thinking that it would be something I would surely enjoy.  And they were right!  I will be keeping my eyes open now for similar Open Studio tours in the future.