My stitched postcard for the Great Big Stitched Postcard Swap is due, and this weekend I sat down to give the project some serious consideration.
I was greatly inspired by an article in the Handcrafted publication (Volume 8), entitled, "Quilted Love Notes," by Jen Osborn. I loved her layered fabrics, rough edges, primitive stitches, vintage photos, attached buttons, and printed ribbons. My own fabrics, photos, ribbons, and stitches fell into place so naturally that it felt like a project that was definitely meant to happen!
I have a tendency to demand a certain perfection to my projects. That is not to say that I think I am so great and so perfect; it is to say that I think all edges must line up, and paper must not rumple or tear, and stitches must align perfectly. And it is to say that I toss things out in frustration that do not fit that standard. For whatever reason, I felt blissfully freed from those requirements with this project, and I love the overall floppy, off-kilter, primitive feel of what resulted.
Rather than using hand-dyed fabrics, as Jen did, I scrounged around in my fabric stash for some likely candidates for my postcards. My stash consists of old blue jeans, an old pair of off-white corduroys, and a huge stash of my kids' outgrown clothes that seemed to have nice patterns or designs. And rather than using the custom-printed ribbons by Anna Barrow that Jen mentions, I took old seam binding from my grandmother's stash, and used blue Staz-On ink and some rubber stamps to make my own custom messages.
The actual placement of elements felt easy and natural. The most challenging task was just figuring out which layers to stitch together first so that any hand-stitching of buttons or photos did not require needle-breaking work through too much fabric.
I even got to raid my modest button collection for a few appropriate embellishments for each postcard.
I had so much fun putting stitched postcards together, that I ended up with three possibilities to choose from for the swap. I have decided to send "Object of My Affection" to my swap partner, because I have found appropriate homes for the other two.
This stitching project kept me reaching into my fabric, binding, and paper stash all weekend, so I have a few more projects to share with you in an upcoming post. And to all those wonderful people who have sent me mail art over the past few months that has gone woefully un-reciprocated: I promise that there will be something fun in your mailbox SOON!
Showing posts with label fabric crafts. Show all posts
Monday, October 14, 2013
Friday, August 23, 2013
Simply Handmade: Button Hair Bands
Some of my favorite projects are the very simplest.
I recently pinned a photo to my very small "Neat Ideas" board, showing how to spruce up a simple hairband with a button. I went to my button collection, and pulled every one that had a shank on the back (the little loop, as opposed to buttons that are flat, and have holes in the middle). Then I had to narrow it down to the shanks with a big enough opening to thread a hairband through. With one simple move (illustrated in the Pinterest pin and the Dream Patch post), I had a collection of much fancier hairbands for my girls.
Here is a closer look at some of these simple new creations:
So, clearly for this project, you need pretty, fun or funky shank buttons, with large loops on the back. I used an awl more than once to help poke the hairbands through. (An awl is the pointy tool used in bookbinding.) It also helps to have pretty colored hairbands to match to your buttons.
The woman at Dream Patch points out in her blog post that you can spruce up hairpins using the same technique, just sliding the pin through the button shank. Simple brilliance!
Somehow, then, I found myself on My Paper Crane, where Heidi made her own fabric-covered buttons to turn into hairband embellishments. I remembered immediately that I had a button kit tucked away that I had been wanting to use, so I dug it out, along with fabric scraps collected from my kids' discarded clothing, and got to work making my own buttons for creating fancy hairbands.
The process is simple, because I just followed the directions for the kit.
After you cut out the circle, you lay it face-down on one of the plastic pieces they provide. Then you lay what will be the front of the button on top of it and press down.
For the next step, you tuck all the edges of the fabric inside, and press the back of the button (with the shank attacked) down on that. This step can take a little effort, depending on how thick your fabric is! I couldn't get denim to work at all.
You then just pop out and admire your fancy new button!
Of course, Mommy can't experiment with any new craft without little fingers bursting in and demanding to participate! Both my four- and five-year old were able to make two buttons apiece with just a little bit of Mommy aid:
And they happily wore some new button creations for the rest of the day:
I'm not sure that we need quite as many button hairbands as I am likely to create buttons for, so I imagine I will end up with a jar of brightly decorative buttons on a shelf in my craft room before this fabric button-covering craze passes!
I recently pinned a photo to my very small "Neat Ideas" board, showing how to spruce up a simple hairband with a button. I went to my button collection, and pulled every one that had a shank on the back (the little loop, as opposed to buttons that are flat, and have holes in the middle). Then I had to narrow it down to the shanks with a big enough opening to thread a hairband through. With one simple move (illustrated in the Pinterest pin and the Dream Patch post), I had a collection of much fancier hairbands for my girls.
Here is a closer look at some of these simple new creations:
| One of my favorites for the girls. |
| I'm thinking this one might make it into my 'do. |
| Pretty with any color band. |
| What? You don't have a cow button? |
The woman at Dream Patch points out in her blog post that you can spruce up hairpins using the same technique, just sliding the pin through the button shank. Simple brilliance!
Somehow, then, I found myself on My Paper Crane, where Heidi made her own fabric-covered buttons to turn into hairband embellishments. I remembered immediately that I had a button kit tucked away that I had been wanting to use, so I dug it out, along with fabric scraps collected from my kids' discarded clothing, and got to work making my own buttons for creating fancy hairbands.
The process is simple, because I just followed the directions for the kit.
After you cut out the circle, you lay it face-down on one of the plastic pieces they provide. Then you lay what will be the front of the button on top of it and press down.
For the next step, you tuck all the edges of the fabric inside, and press the back of the button (with the shank attacked) down on that. This step can take a little effort, depending on how thick your fabric is! I couldn't get denim to work at all.
You then just pop out and admire your fancy new button!
Of course, Mommy can't experiment with any new craft without little fingers bursting in and demanding to participate! Both my four- and five-year old were able to make two buttons apiece with just a little bit of Mommy aid:
And they happily wore some new button creations for the rest of the day:
| Aerial view! |
Monday, November 26, 2012
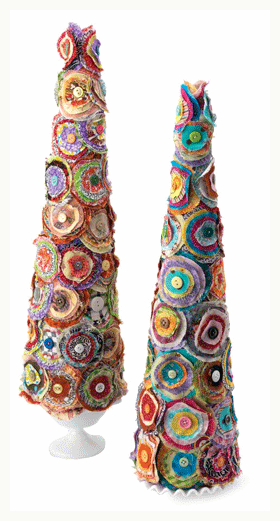
Fabric Circle Topiaries
| Source: Cloth Paper Scissors Today e-Newsletter |
Don't the flowers look exactly like the layered fabric flowers I blogged about earlier this month?! I could use dressmaker pins to affix them to a styrofoam tree form, and I would have a Fabric Circle Topiary of my own!
I'm not sure the project really suits my style, but it was still super-fun to open up the e-mail message and see something that uses an element so similar to what I had just created.
Monday, November 12, 2012
Layered Fabric Flowers
I was seeing photos of layered fabric flowers in all sorts of publications and on all sorts of web sites, and I knew I wanted to try making some. When I ultimately saw a piece about them as a kids' craft in Disney's Family Fun magazine, I knew it was time to sit down and see just how easy they are to make!
I have a stash of my children's outgrown clothing--pieces that I've held back from the Goodwill donations pile because something about the color or pattern makes me want to save it for a fabric project. My two big fabric bins also hold several pairs of old jeans and some of my own old sweaters. I used this supply to choose cloth for my layered flowers.
I separated the pieces I found pretty into "color families"--groupings that I thought looked nice together. From there I used a circle template to draw with a fabric pen (the kind with ink that disappears within 24 hours), and then cut the circles freehand from there.
Once I stacked the concentric circles one on top of another, I chose a button from my collection for the center. I pulled out several of my favorites, and my daughters helped me to make my choices. They loved playing with the buttons, and checking out different ones to see which looked best with the stacks of fabric circles. I maintained veto power, and they took my rejections well as long as I let them play with the remaining buttons while I stitched the chosen one to the center of the fabric flower!
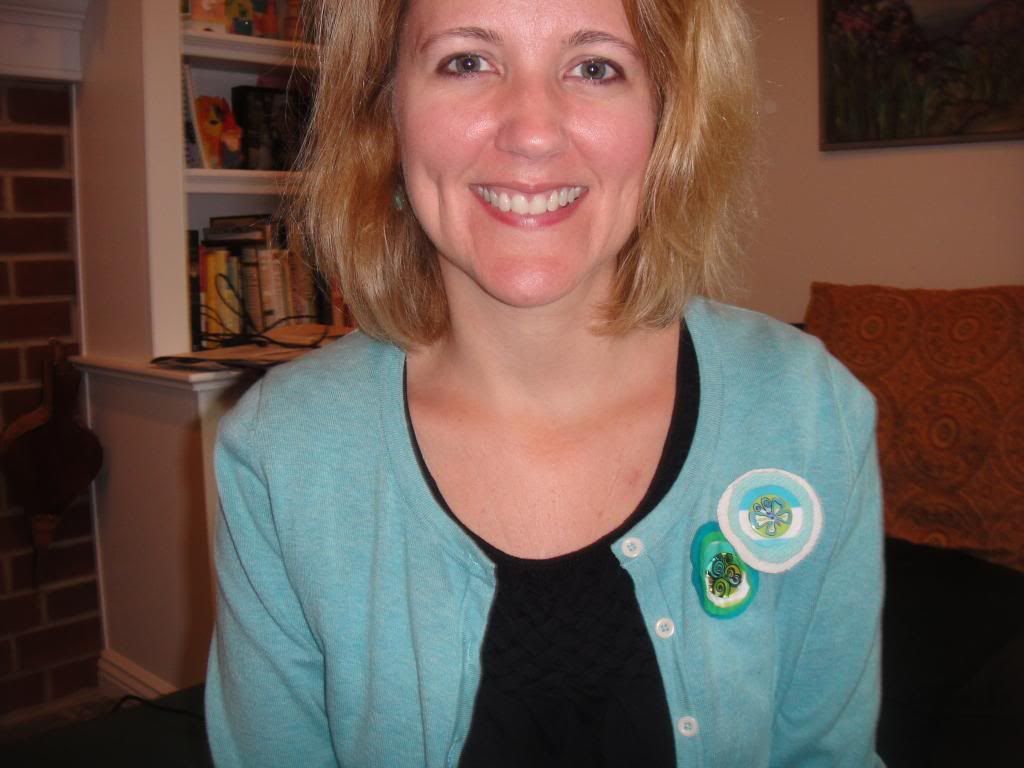
I use a small straight pin to attach them to my shirts (though perhaps a safety pin would be a better idea!), and have worn the flowers out to lunch and to two recent craft fairs. I have always gotten positive, though not effusive, comments on them.
I tried doing some freehand stitching on one of the pins to see if it added anything to the look. It was quite a challenge to stitch on such a small space with a button right smack in the middle of it all! I didn't ultimately feel that it added anything, though I might try again prior to attaching the button. Maybe it will add to the design rather than looking like an afterthought (which it was)!
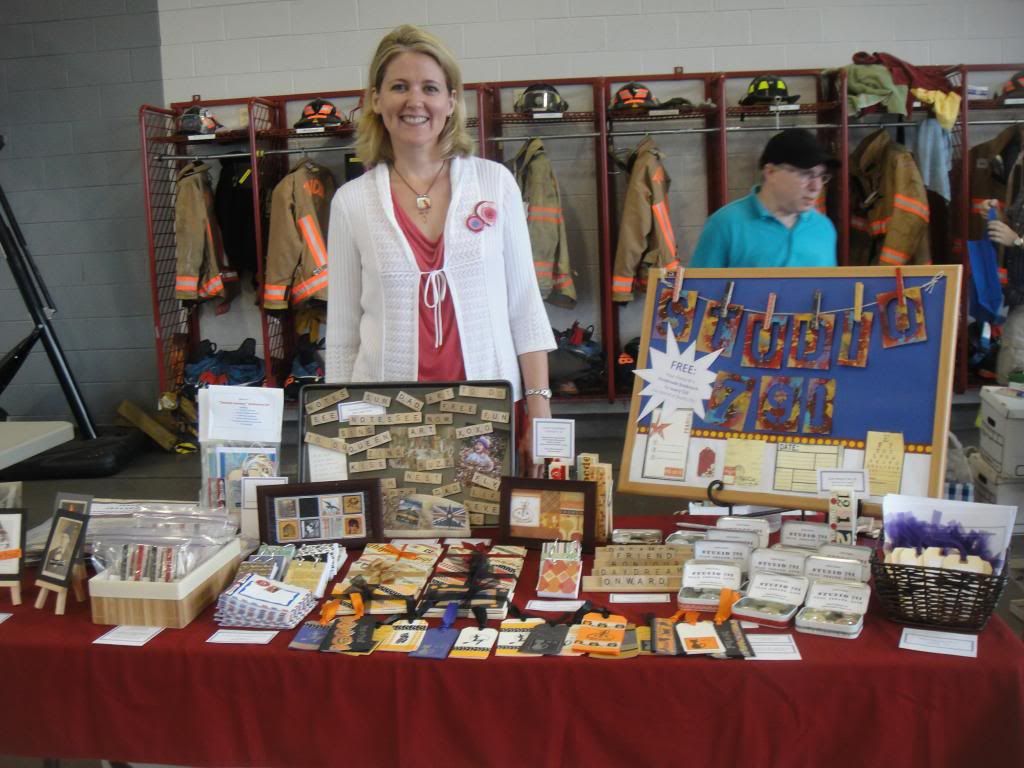
And just in case you were hoping to see yet another photo of me behind my craft show table display, here is a picture of my spread at the Interboro High School Fall Craft Fair this past Saturday.
I was delighted to receive an entire cafeteria table for my goods; I was able to put out some things that I sometimes skip when space is tight. For example, I offered my Colorful Journeys Stationery Sets for the first time in awhile, and sold three of them, which really pleased me.
I don't make or sell anything that I don't like, but I do have special favorites, and take the greatest pleasure when people decide to take them home with them!
My last craft show of the year is on Saturday, at Haverford High School, where I spent 9 out of the 11 total years I worked in the field of education. It will be fun to be in those halls again, this time selling my handmade art and crafts rather than teaching European History or World Cultures!
I have a stash of my children's outgrown clothing--pieces that I've held back from the Goodwill donations pile because something about the color or pattern makes me want to save it for a fabric project. My two big fabric bins also hold several pairs of old jeans and some of my own old sweaters. I used this supply to choose cloth for my layered flowers.
I separated the pieces I found pretty into "color families"--groupings that I thought looked nice together. From there I used a circle template to draw with a fabric pen (the kind with ink that disappears within 24 hours), and then cut the circles freehand from there.
Once I stacked the concentric circles one on top of another, I chose a button from my collection for the center. I pulled out several of my favorites, and my daughters helped me to make my choices. They loved playing with the buttons, and checking out different ones to see which looked best with the stacks of fabric circles. I maintained veto power, and they took my rejections well as long as I let them play with the remaining buttons while I stitched the chosen one to the center of the fabric flower!
I use a small straight pin to attach them to my shirts (though perhaps a safety pin would be a better idea!), and have worn the flowers out to lunch and to two recent craft fairs. I have always gotten positive, though not effusive, comments on them.
| If you look closely, you can see a different two flowers pinned to my sweater for the firehouse craft show. |
And just in case you were hoping to see yet another photo of me behind my craft show table display, here is a picture of my spread at the Interboro High School Fall Craft Fair this past Saturday.
| You can see another layered fabric flower on my sweater here: same sweater, different flower! |
I don't make or sell anything that I don't like, but I do have special favorites, and take the greatest pleasure when people decide to take them home with them!
My last craft show of the year is on Saturday, at Haverford High School, where I spent 9 out of the 11 total years I worked in the field of education. It will be fun to be in those halls again, this time selling my handmade art and crafts rather than teaching European History or World Cultures!
Subscribe to:
Posts (Atom)