Showing posts with label collage. Show all posts

Wednesday, July 20, 2016

Dendritic Exchange

The title of this post makes it sound as though I have participated in some sort of medical procedure or scientific partnership.

In fact, I've just done a fun mail art exchange!

Awhile back, I shared with you the process of creating decorative papers using the dendritic painting method I watched at Atomic Shrimp.

Jewels, of Just Tickety-Boo, who first shared the video with me, initiated a mail art swap using the results of our dendritic painting experiments.

From the beginning, I imagined the shape of a person's head made out of the dendritic papers, since they look like neurons or nerve endings.  Then, I wanted to use inspiration from the wonderful collage and mail artist, Lenore Tawney, so I flipped through the book Signs on the Wind, and came away with this postcard to send to Jewels:
In return, Jewels sent me this postcard (tucked inside a fireworks-emblazoned envelope!):
Her use of the dendritic painting is much more subtle than mine, and you can definitely see how it adds to the layers of her background:
I love the vintage woman image--I have been scouring books and magazines for these kinds of vintage images, as I'm finding images of women and their roles from the 1930s to the 1950s very inspiring right now.

As an added compliment, Jewels told me that she chose the dictionary definition of the word "cheery" because she imagines it to be a word that describes me.  I certainly try to hang on to my cheeriness, so this is much appreciated!

I definitely feel some pressure when it comes to doing a mail art exchange, especially when there is an "assignment," such as using the dendritic papers.  But it is so very satisfying once the project is completed, and I have another piece of mail art from an online friend to add to my collection!

Monday, April 11, 2016

The Return of Drawing Near

And just like that--without notice or fanfare--I am returning to my little creative corner of the Interwebs.
The mess on my work table NEVER went away!
I miss keeping track of my creative pursuits.  While writing for my Living Stones blog and working on a larger writing project, I have continued to "fill my creative well" with inspiration from creative excursions.  I've kept tabs on some of my blogging friends, though I haven't been an active comment-er on others' posts.  And I've kept Studio 791 abuzz with activity, though I haven't felt the need to stop and snap pictures along the way to archive projects for the blog.
A recent mail art project.  Hmmm...who will be receiving this soon?
Now that I'm back, my posts will probably be a little more image-heavy, rather than text-heavy.  Just some peeks at my studio, projects, and excursions.  I'm not going to lie--it was a nice, almost-year-long break from writing blog posts, giving me the freedom to DO without the rehashing.  But if I take it slowly and just dip my toes back in the water, so to speak, I think I can manage the benefits of blogging without the burdens.
And I hope to make it back around to blogging friends, and discover some new blogs that have blossomed during my absence!
Let me know if you have found your way back here again.  I am going to make a real effort to keep myself from getting caught up in the anxiety that hinges on page views and comments, but I look forward to reconnecting with people who take the time to visit, and folks whose interests intersect with mine.
So I guess I'll see you around!

Tuesday, June 9, 2015

Collaged Coin Envelope Mini-Books

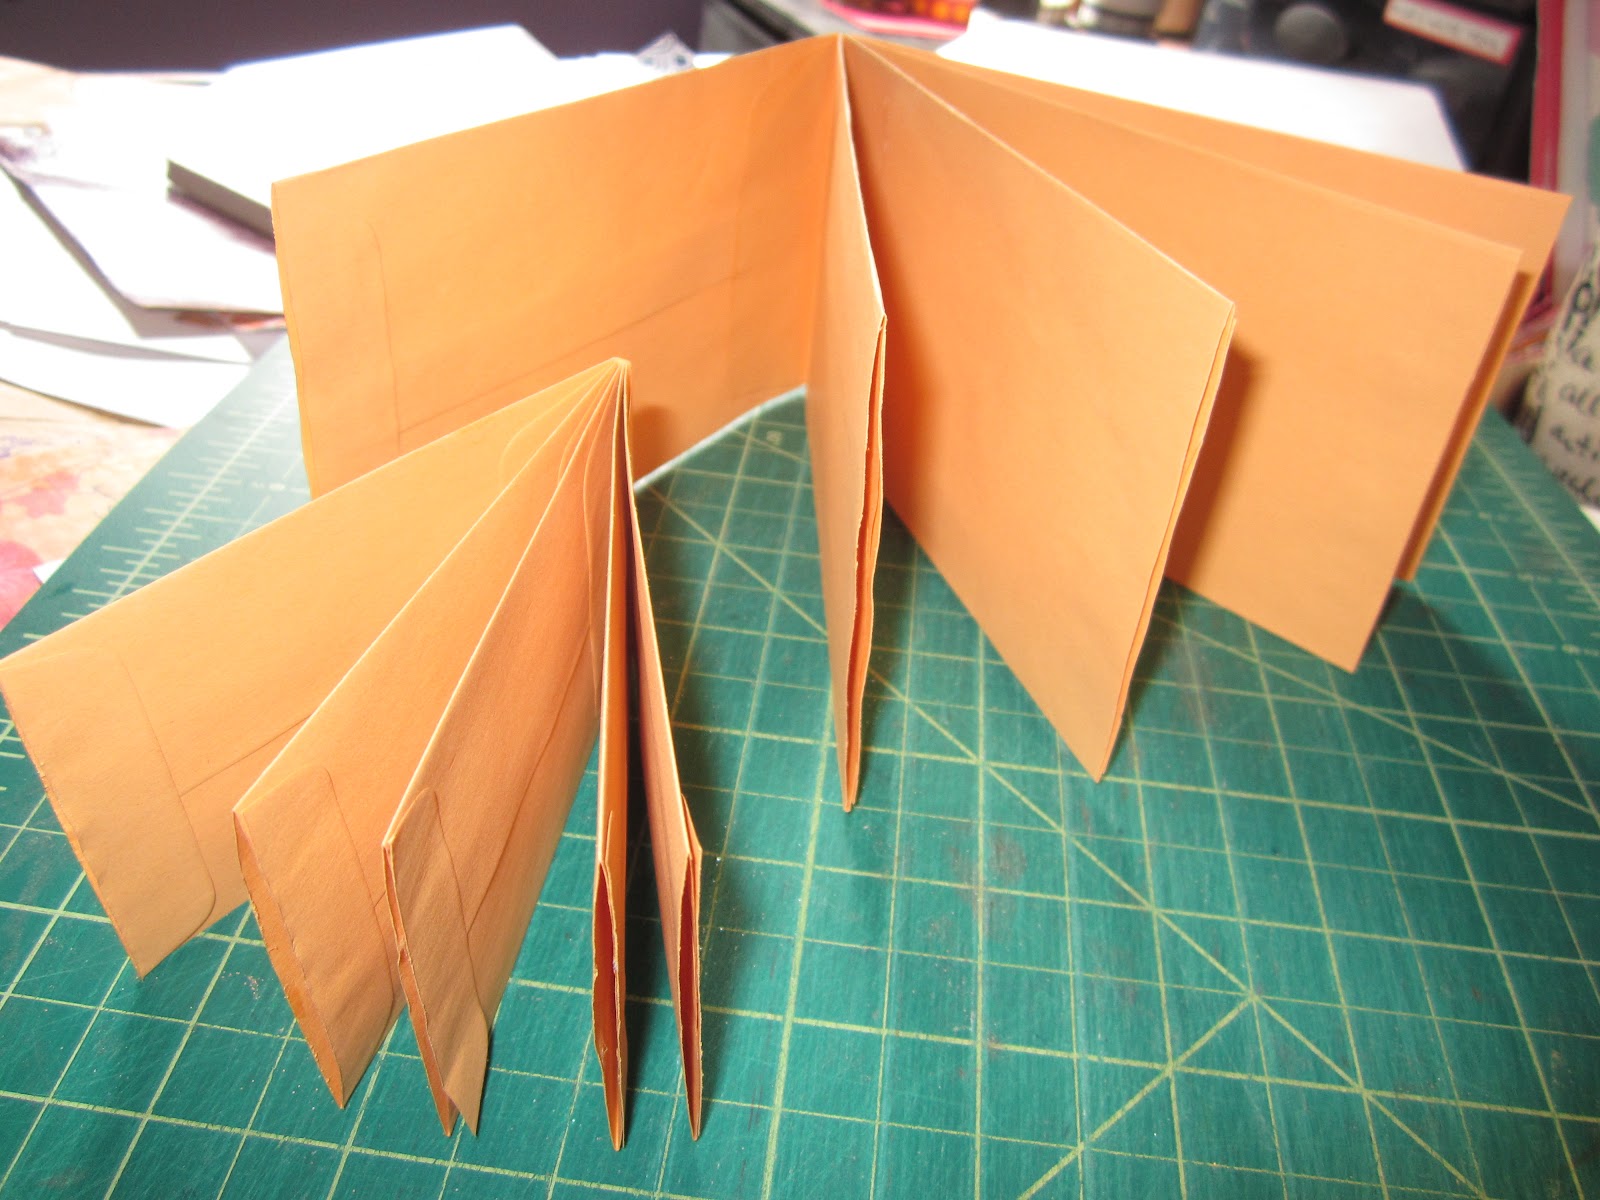
Of all my 80 boards on Pinterest (Yikes!  How did that happen?), I think my very favorite is my Book and Journal Making Board.  Pretty much any pin on it makes me want to head directly to my studio and pull out my supplies.  Recently I was looking for a super-simple book-making design to try, so I clicked on my pin for Julie Fei-Fen Balzer's coin envelope books.

She has two designs:  One has the envelopes opening to the outside edge so that tags and such can be tucked inside the pages:
The other design has the envelopes opening up toward the inside spine:
I made each type of book in two different sizes, and then chose one of the tag-ready books to collage for a final project.
I had a lot of fun just playing around with the pages, using my rubber stamps, which don't always get a whole lot of use around here anymore, as well as some paper and sticker goodies from my awesome blog friend Pamela at Cappuccino and Art Journal.  Here is the little book's cover:
And a peek at the spreads inside:
 And the back cover of the mini-book:
I made tag inserts from a BINGO card, scrapbook paper, and business envelope liners, and added baker's twine pull strings. Each pocket of the mini-book has its own tag.
So here is the final result of the collaged coin envelope mini-book, complete with tags:
For very clear instructions on putting these coin envelope books together, visit Julie's blog here!

Tuesday, May 26, 2015

2015 iHanna International Postcard Swap

I mentioned in an earlier post that I am participating in iHanna's international postcard swap again this spring, and wanted to share with you the cards I will be sending out into the world this time around.
My set of ten cards has a definite theme this year, which I will explain shortly.  But to begin the process, I cut smooth, white Bristol paper into ten pieces, each 4 inches by 6 inches.  I put a light wash of watercolor on them, and then applied distress ink through a couple favorite stencils using wedge makeup sponges:
For my next step, I glued down some of the old cancelled checks I purchased from the Allentown Paper Show, followed by a selection of Depression-era photos from a book I found at a local thrift shop called Nana's Attic.
Each card got a turn under my sewing machine needle, where I used one of three different colors and a couple of different stitches to outline the pictures or make a band across the postcard.
Finally, I used my "new" old typewriter to type the sentence, "We had everything but money," once for each card.  This sentence is the title of the book I used as the source of my pictures.  I know that some people insist that they only cut up books for their art that are so old and falling apart that they had no other life left in them.  I am here to confess that this book was in perfectly fantastic shape, and I purchased it for the express purpose of cutting out and using its photos.  But as I went through it, I read every single word.  What an amazing book!  It gave me such tremendous insight into the lives of people during the Depression and Dust Bowl eras, and such tremendous respect for the people who made it through with such positive attitudes and memories.
After affixing some postage stamps--some from this very era--my postcards for the swap were complete.

My cards, then, are an attempt to show some of snapshots of life from the 1930s:  how resilient people clothed themselves, fed themselves, dressed themselves, educated themselves, fell in love, worked and played and traveled and LIVED in the face of the incredibly challenging circumstances of that particular decade of United States history. 
Here are my postcards, awaiting the final touches to the messages on the back, about to be sent out into the wider world of mail art lovers!
Many thanks to iHanna for her tireless inspiration!

Tuesday, May 5, 2015

Digging into the Stash: Collaged Contact Cards

I like to keep a stack of cards on hand with my email and blog addresses for times when I meet someone new who might be interested in my art or my blog. 
It makes sense for those cards to reflect my aesthetic, so I tend to create mini-collages with vintage papers and a mail-art theme.
The back contains my name, email address, and blog URL.  Last time I made these, I very sensibly made them the size of Artist Trading Cards (ATCs).  This time, I made them the size of a standard business card.  I'll return to ATC size next time!
You will recognize papers from the Allentown Paper Show used in these collages.  I used the canceled checks from Farmer's National Bank as the foundation for my cards, then added postage stamps and Cavallini mail-art themed rubber stamps to embellish them.  Some of the cards also include the Grand Union Tea Company tea checks and grocery store merchandise stamps. 
And while I had all my cut-and-paste supplies out on my art table (though, really, when DON'T I have them out?!), I got started on another project. Any guesses what it might be?
I'll tell you!  I am participating in iHanna's DIY Postcard Swap, Spring 2015!  It's been a few years since I have participated, but when I signed up, I dug right in and started creating my cards.  Stay tuned, and I'll share my process and my final results SOON!
Why don't you swing by and sign up, too?!

Wednesday, January 14, 2015

Success! (Another Pieced Paper Collage)

In my last post, I showed you my first attempt at a pieced paper botanical collage, using the design and technique presented by Susan Black in a 2013 Cloth Paper Scissors article.

I commented that I looked forward to trying the technique again, using my own design, so that my final result will feel less forced and more original.

Success!
I designed my own piece, using drawings of seed heads and dragonflies from 20 Ways to Draw a Tree by Eloise Renouf as reference pieces.
I also chose my papers more carefully for this piece, being certain that they all appealed to me individually and in concert with one another, and that they felt balanced on the page.
Finally, I did not include any handwritten element.  As much as I like to include printed words in my collages, I'm not "there yet" on incorporating my own lettering and enjoying the results.
With those changes from my dress rehearsal attempt, I created a piece that I really enjoy! 

Caatje mentioned in her comment on the last post that "often our opinion of our work is not so much about the work itself, but about how we felt when we made it."  How true!  Making my first piece I was focused on following the instructional steps and using Susan's design, which probably led to my feeling that the final result looks forced.  On this piece, I was excited to create my own design and make the project "my own," and it feels much more natural and original.  

I am encouraged to continue creating these pieced paper collages on coffee-wash backgrounds!

Saturday, January 10, 2015

Pieced Paper Botanical Collage


I had a dress-rehearsal today for a pieced paper collage technique that I would like to explore further.  I'm not entirely satisfied with the results, but I think that if I try it again with a more original design, the final result will feel less "forced."
I used a tutorial by Susan Black, published in Cloth Paper Scissors back in July/August 2013.  The first step is to brew black coffee to use as a stain for my watercolor paper.  I used a packet of instant coffee that I've had in my craft stash for years for just this purpose.
I used a 2-inch foam brush to lightly apply a wash of the coffee to my 9x12 sheet of cold-press watercolor paper. 
Then I dabbed more coffee onto the paper, and the initial light wash "contained" the pools of coffee within their perimeter (except for a couple renegade dribbles that ran off the side of two of the four papers I stained).
I tilted and turned the paper to let the coffee run around the page, and then used my embossing tool to further spread it around the page.  It looks like a very light wash of neutral color until it dries, and then you can see the varied layers quite well.  There is no way to tell how a given background will turn out, which is part of the fun of creating them.  Here are the four different backgrounds I created:
For the next step, I drew a pencil sketch onto tracing paper, using basically the same design that Susan Black uses in her article.  She advises us to place the tracing paper over top of the coffee-stained background as we draw, which helps with the composition and design.  Next, I held the watercolor paper up to the window with the tracing paper underneath, and copied the design onto the watercolor paper.  In retrospect, I would trace it quite lightly, because the pencil lines are not part of the finished product.
Finally, I painted the stem, and then chose papers from my stash to piece over the drawing to create the collage.  I used my tracing paper drawing again, holding it up to the sunny window under the scrapbook papers I selected.  I drew the shape in pencil, and then cut it out and fit it into its place in the collage.
I used a glue stick to adhere the papers.
I used watercolor paint for the stems--vidrian hue toned down with burnt umber.  Then I used a black pen to add outlines, dots, leaf veins, and accents to the stems.  I used two colored markers, including one with a bit of a metallic quality, to write the word "wonder" in the corner of the collage.
I like it, yes, but I copied Susan Black's design almost directly, and I would like to do a more original piece next time.  I feel as though the piece looks "forced" when it so closely mimics her work.  I enjoyed the process, though, and look forward to trying it again, when I can make the final result more "my own."