Wednesday, January 30, 2013

Books! Books! Books!

It turns out that making a reading list for myself for 2013 might be one of the best ideas ever!  I've read five books in a month--a reading rate that I haven't enjoyed in ages.
Three of the books I read were on my original list, while two were other titles that I picked up from my bookshelves as they caught my attention.  Here are some of my thoughts and reactions during my reading, in case you might be interested in some of these titles as well.
Creative Display, by Geraldine James, got me thinking about how I wanted to decorate the house once the Christmas decorations came down.  The book (purchased from the Clearance room at Anthropologie) inspired me to head to the basement and find some decorative items that I had packed away years before, as well as rearrange items that didn't look quite right to me on our family room shelves.  I wanted a "vignette effect," areas of interesting objects grouped together that bring me pleasure when I look at them. 
Some of the reviews on Amazon were critical that the book didn't provide textbook kind of advice on creating displays, but I thought it was more of a book to "marinate in" and let it influence my next move.  I've picked it up at least three different times after reading it, in order to flip through the pages and re-kindle my decorating instincts.
What Happens When Women Say Yes to God:  Experiencing Life in Extraordinary Ways, by Lysa TerKeurst was a great inspirational read.  The message of the book is to say "yes" to God, even before we know what He might ask us to do, so that we do not miss the "divine appointments" He has in mind for meeting with us in our lives.  I like the idea of God seeing a "yes-heart in me," in Lysa's words.
"...if you are in the thick of living with all that life throws at you and you simply whisper yes, you are equipped.  'Yes, Lord.  I want Your patience to invade my desire to fly off the handle.' 'Yes, Lord.  I want Your perspective to keep my emotions in check.' 'Yes, Lord. I want Your provision so things don't seem so overwhelming.' 'Yes, Lord.  I want Your courage to do what I feel You calling me to do.' 'Yes, Lord. I want and need more of You in every moment'" (13). 
If building your relationship with God, learning to see Him at work in your daily life, and being able to rest in His presence speaks to your soul, then I would recommend Lysa's book to you. I am interested now in reading some of her other books (especially, Becoming More Than a Good Bible Study Girl), and have bookmarked her blog for further reading.
I picked up my copy of Collaborative Art Journals and Shared Vision in Mixed Media by L.K.Ludwig to re-read when I was asked to participate in my very first Art Journal Round Robin.  I am in the midst of preparing my own journal for the exchange, and will be working with Mary, Janet, and Danielle for the project.  I am very excited to try something new like this.  Ludwig's book provides plenty of art journal eye candy (you can see all my blue sticky notes sticking out from the pages), and gave me some fun ideas for my journal, such as some options for a sign-in page for the participants. 
She talks about some of the practical considerations of hosting a round-robin (duties that Danielle is graciously attending to, such as working out an exchange schedule), and has chapters for all kinds of art-sharing, including art journals, swaps at retreats, individual swaps, and swaps of more dimensional art work. 
This book isn't going to add to your repertoire of art journaling techniques so much as inspire you with gorgeous examples from a variety of artists.  And it gave me ideas for future art exchanges that I might be interested in trying to host!
I ordered the book Sticky Faith:  Everyday Ideas to Build Lasting Faith in Your Kids, by Dr. Kara E. Powell and Dr. Chap Clark because of the title more than anything.  I have read a few really high quality books about parents sharing their faith with their children, and I thought this might make a good addition to that particular section of my library.  There is much for a parent to take away from reading it, but even more, its target audience would seem to be pastoral staff and youth group leaders.  The authors are especially looking at how to build faith in teenagers that will last through and beyond college, which is a time when many young Christians "shelve their faith" for awhile. 
There was some really good food-for-thought, though, such as helping our kids discover what it means to trust Christ in everyday life, as opposed to having a "doing Christianity" that focuses on youth group meetings, quiet times, short-term mission trips, student Bible studies, and the like.  It also made me think about the importance of building a network of loving adults who care about my children's well-being and future, and having intergenerational church experiences.  I started thinking about ways that my own church could develop its outreach to teenagers headed off to college, members who are currently in college, and young people who have just graduated and are returning to church. 
Finally, I read Happier At Home by Gretchen Rubin.  Her first book, The Happiness Project, launched me into a Happiness Project of my own that got me jogging, breathing deeply for self-control, and looking for healtheir, non-toxic alternatives for my home and personal care products (among other things).  Gretchen's second book was just as inspiring to me as the first.  She wrote very much from a place where I am right now.  Many of the projects she undertook were the kinds of things I have been undertaking myself, and refelect the theme of simplicity that I am seeking this year. 
For example, her whole chapter about being happier about our possessions focuses on simplicity.  Rubin writes, "Cultivating my possessions, then, wasn't a simple matter of organization, elimination, or accumulation; it was a matter of engagement."  To that end, she set out to "cultivate shrines" around her house--"places of super-engagement."  This idea very much reflected my own decorating instinct brought to the forefront by the Creative Display book.  What Rubin referred to as a shrine, I thought of as a vingette--a place where we identify, arrange, and spotlight meaningful possessions. 

In the same chapter, she talked about getting rid of materials for a project she'll never finish; my plan is to finish all those projects I've purchased materials for.  She decided to ignore feng shui; I have feng shui books leering at me from the bookshelves, with ideas I've never managed to incorporate.  She talked about preserving sentimental objects that she cherishes; I just purchased archival boxes and sorted the girls' artwork from the past five years.  She tackled the task of reading the manuals for machines and gadgets, and I read the manual for the camera my husband bought me for Christmas (though I found out that the real meat of the directions is on a CD in the camera box, which I haven't yet looked at!).  Rubin's anxiety over family photos closely mirrors my own, and her "quest for a cause" mirrors some of my own thinking. 

The advice that stuck in my head so that I was able to put it to immediate use was her plan to undereact to problems.  I can't tell you how many times something will go wrong with the girls--a drink spilled, a bowl of beads spread out over the kitchen floor, a broken toy--and the words "underreact" floated through my brain and helped me to keep my cool. 

****************************************
 
I am currently reading four books at one time--a Bible study text for 1 Corinthians, a novel from my 2013 reading list, a non-fiction book from the library, and a home decorating book from my bookshelves.  I have something to pick up in any mood!  I feel like having a reading list for the year is making me more conscious of my reading and more inclined to pick up a book instead of spending mindless hours on the Internet.  It feels like a very good use of my time!

Sunday, January 27, 2013

Weekend Update

The Great Kaskey Plague has a pretty solid hold on our home these days, and between my husband and my children, someone is always coughing, blowing their nose, or fighting a fever.  We did manage one fever-free window on Saturday to enjoy the fresh coating of snow our neighborhood received the day before.
The lightly snow-covered suburbs
You can't beat the icy elegance of nature.
It felt glorious to be out in the cool, crisp winter air.  As tiny as the hill in our backyard is, I was as excited as my preschool daughters to be sliding down on our plastic snow saucers. 
A turn with Katy...
...and a turn with Bayla.
Back inside, I hunkered down to tackle some projects.  I recently received an invitation from Mary (Joyful Ploys):  she had some empty space at the back of a journal that had been making the rounds of a Round Robin over the past year, and she was kind enough to invite me to complete two spreads to fill some of the remaining pages. 
Cover of Mary's handmade journal
Detail:  I love that face!
Here are the contributions I'll be sending back to her:
My art journaling is clearly helping me deal with the ongoing presence of winter!

I also found a great approach to clearing off my craft table!  I had stacks of paper on the table for making my Valentine cards and collages.  Instead of putting them away, I cut and tore them into strips, then stitched them down to create even more heart embellishments.
Now I have an even BIGGER stack of heart embellishements to choose from for my giveaway.  (Last day to leave a comment on the giveaway post is January 31!)
So, I am experiencing the very worst (sickness!) and the very best (playing in the snow!  hunkering down for art-making!) that winter has to offer. 

Wishing you happy winter days and cozy winter nights!

Thursday, January 24, 2013

Christmas in January: Recycling Christmas Cards

This past Christmas, I was thinking about how there are so many projects that I want to try every year around the holidays, but I never seem to have time to get to them all.  By the time I have a moment to sit down and think about Christmas crafting, it's almost too late in December to bother!

So, I had this idea to try out different Christmas crafting ideas throughout the year, so that when December 2013 rolls around, I won't find myself in the same position:  looking at dozens of projects that I would like to do, but simply don't have the time for.  To that end, I am planning a "Christmas in [Insert Month Here]" series.  Each month, even in the high heat of the summertime, I am hoping to do a Christmas project that I have bookmarked and wanted to try.

For Christmas in January, I played around with a bunch of different ways to recycle the Christmas cards we received.  I had so much fun with this, and am really excited about the results.

Top 10 Ways to Use Your Old Christmas Cards

1.  Gift tags. 
This is, perhaps, the "no brainer" idea; I've been doing this for years.  All you have to do is cut out a cute part of any card.  Cutting it into the shape of a tag and punching a hole in it for ribbon are purely optional.  You write your To and From on the front if there is room, or on the back if there is not.  Simple, simple.
I mounted the card parts onto solid colored paper to cover up any messages that might have appeared on the back.  Also, all three of those small pictures--the wreath, the dog, and the candy canes--appeared on the very back of the cards, near the name of the company that printed them.  Don't forget to look at all parts of the card for potentially useful images and sentiments!
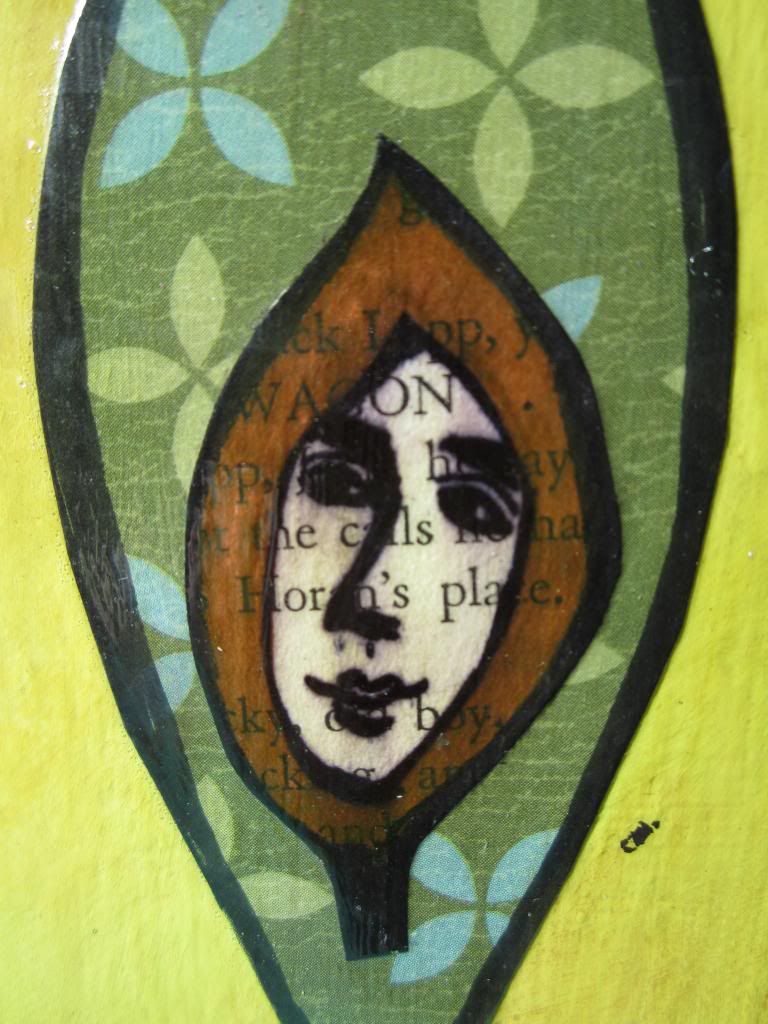
2.  Bookmarks.
This is the first time I have tried this, and I am so happy with the results.  Bookmarks can come in any number of sizes, so cut any long, narrow portion of a card that looks nice.  Punch a hole in the top for a ribbon or some other kind of fiber.  (I've had these braided cords sitting in a drawer, unused, for years.)
The beautiful Santa card came from April Cole, and had a Santa image raised up on foam from another Santa image, so I got two-for-one! 
3.  Postcards
One of my mail art friends sent me a postcard made from the front cover of a Christmas card, and it was a total, "Why didn't I think of that?!" moment.
From the front, they look just like regular Christmas cards, but turn them over and you discover that they are actually...
How fun and easy is that?!

4.  New Cards
Sometimes it's fun to re-envision a card and make it into something new.  I took this beautiful photograph of a vintage Santa ornament from the front of a Christmas card, and cut it into several small squares, which I arranged on the back of another (hot pink) Christmas card we received.  By mounting it on a kraft paper card, I created a whole new card!  (The original photo, by the way, was taken by Lisa Leitch of Montana Trails Photo, which she co-owns with Randy Updegrove, my husband's cousin.)

5.  Garlands
Everyone is rather garland-crazy these days, and I've been wanting to see how it works to sew paper shapes together, leaving spaces in between.  (I couldn't really get my head around that until I tried it!)
I used a circle punch and two different Christmas cards, then sewed the circles together with red thread on my machine.
I decided to show it off at an angle that gives you a peek into my art room!  You could focus on the red parts of cards and punch hearts for a Valentine's Day garland, or focus on the green parts of cards and punch shamrocks for a St. Patrick's Day garland.  In addition to displaying these around mirrors or doorways, they make fun a fun gift-wrapping embellishment.

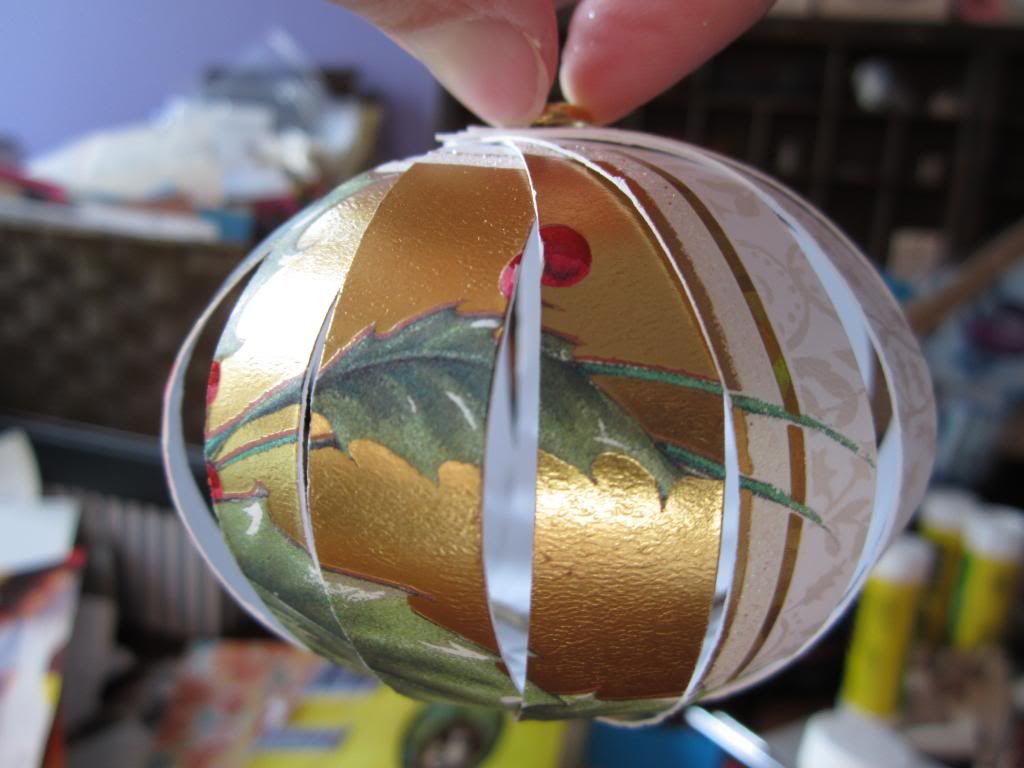
6.  Christmas Ornament
There are all kinds of papercraft ornaments that you can make from your old Christmas cards; the Internet abounds with them, and you can also look in various books that talk about projects you can do with old book pages.  Here is a very simple ornament design:  a Christmas ball.
To make this, all you have to do is cut your card into strips (you can cut stips from several different cards or all from one card).  Punch holes into the top and bottom of each strip.
Stack the strips on top of each other, and put brass fasteners through the holes on each end.
Then you have to fan out the strips to make the ball, as shown in the first picture.  It's a little tricky to get them spaced out nicely so that they look like a sphere that is symmetrically round and doesn't kind of lean to one side.  Let's just say, I don't see myself making a bunch of these, but it was fun to try once, and I can see doing it with my kids in a few years.
 
7.  Confetti
Here's another fun and simple use for your old cards:  confetti! 
You can make any shape confetti that you want...circles, stars, hearts, you name it.  I used a tiny little star punch and focused on gold and purple areas of two different cards.  Some people like to tuck confetti into birthday card or invitation envelopes.  I think it makes a fun "instant party" when you put it in a tiny envelope and include it with an art swap.
Or, you can let your five-year-old get her fingers all sticky, trying to glue it down to a big piece of paper at her art table!

8.  Matchboxes
Okay, there is a steep learning curve for this project, and I don't quite have it mastered yet.  For someone who loves to work with paper as much as I do, it's amazing what a clutz I am when it comes to folding it into any recognizable form.  (Origami Master, I am NOT!) 
I used a template by Rachel Johnson, which you can find on the Swapbot blog.  Take my advice:  don't try making the matchbox for the very first time using your "very favorite, absolutely perfect for this project" Christmas card!  I messed up my first attempt, folding in the wrong places, and got two unsightly folds on the adorable photo of the child catching snowflakes on her tongue (many thanks to Mary for that sweet card!)  I totally flubbed up the little box that slides inside, too, and wouldn't you know that I used up my most wonderfully simple, Christmas-y snowflake card in the process.  I made a slight error in attempt #2, the teddy bear matchbox, but you can't see it unless you turn it over.  I am definitely going to master this paper-folding challenge!  Just not today...
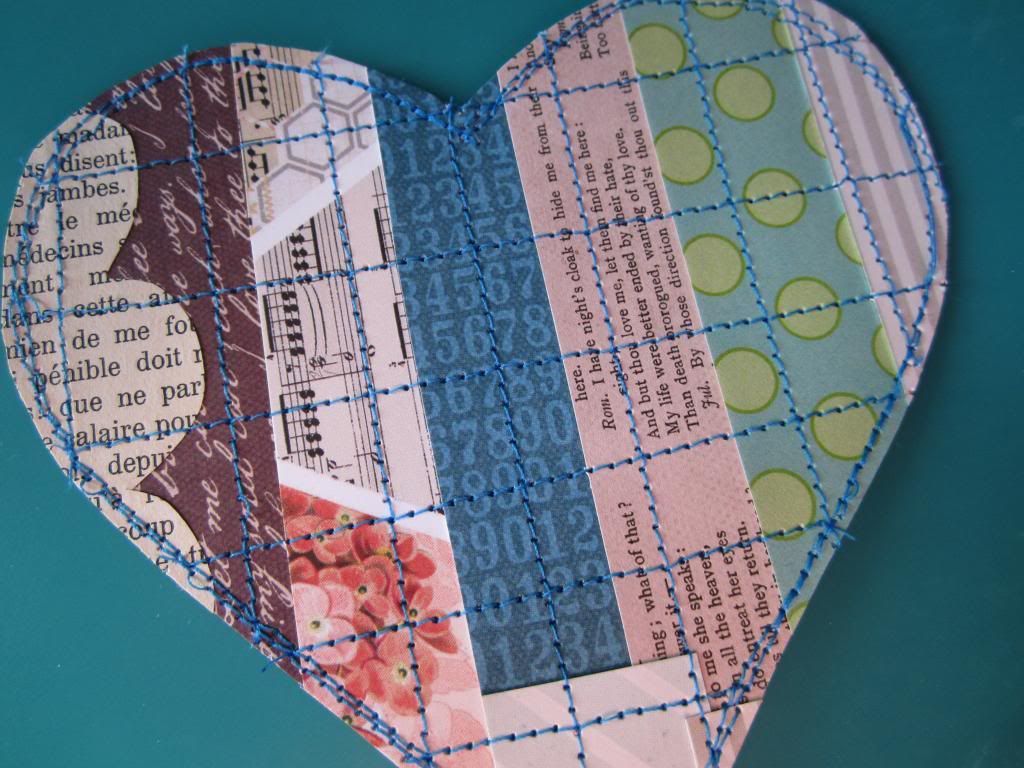
9.  Journal/Notebook
Perhaps my all-time favorite project:  turning an old Christmas card into a stitched notebook. 
This beautiful angel card came from one of my mail art partners.  All I did was fold paper in half (I used a notebook that has graph paper on one side and lined paper on the other), cut it to size, and stitched up the middle on my sewing machine.
I put a piece of decorative tape up the spine on the outside to cover up the other side of my stitching.  There are lots of different ways to handle the closure, too (including, I guess, not having one!).  I wrapped a ribbon around the book, and used a piece of decorative tape to hold it in place in the back even when I have it untied.
All of this from a simple Christmas card!  Wouldn't it be fun to designate this little notebook for all of my Christmas planning lists when November and December roll around?

10.  Placemat
And here is one final idea.  I haven't actually done it myself yet, but I'm including it because I have all the supplies out and ready to go, and I want a nice round 10 ideas to share with you!

I am going to take the family photo cards I received, and glue them down to a large, sturdy piece of paper.  Then I am going to put laminating paper on the front and back of it (you could use clear contact paper, as well).  This will create a placemat that we can use, enjoying the photos of our friends and family as we eat throughout the year!  So many people send photo cards now instead of more traditional Christmas cards, that I could probably get four placemats' worth of pictures.  At least I'll make two with photos on the front and back for my children to enjoy.

So, it looks like I spent a ton of time re-purposing all my old Christmas cards, doesn't it?  In reality, I made all of these things (#1-9) in a few hours over the course of two days.  They are so simple, straight-forward, and fun, and I feel like I got a little more life out of my cards.  It's so much nicer than tossing them in the recycling bin!
 
************************
That's my taste of Christmas in January!  We'll see what Christmas project February will bring!


Tuesday, January 22, 2013

International Blogging Event!

I am participating in my first ever International Blogging Event, being hosted by Vicki of 2 Bags Full.  Her goal is to introduce people to new blogs, while helping them to grow their own blog audience.  (You can find links to all of the participants' blogs here.)
So, for those of you visiting me for the first time because of this fun event, allow me to introduce myself and show photos from previous posts to help you get to know me: 

My name is Andria, and I have been blogging in earnest since January 2011.  (I had two "false starts" prior to that, because I kept re-starting every time I had a baby...not a good time to try to maintain a blog!)
A recent Valentine's Day collage
The blog has evolved primarily into an art and crafts blog, with a record of various projects, swaps, and classes I've done.  I couldn't share my life in a blog, though, without frequently referencing my two daughters, ages 3 and 5.  Many of their art and crafting escapades are recorded here, as well. 
Katy (5), Bayla (3), and I indulging in some edible Christmas crafting this past year.
I have developed some wonderful online friendships with bloggers around the world, many of which have resulted in swapping mail art and other projects.  My mailbox has been a much more interesting place as a result of my blogging adventures!
Altered Rolodex card
You can read about my interest in doing swaps by clicking on the "Swaps" tab at the top of my blog.  I welcome new swap partners who enjoy ATCs, altered Rolodex cards, postcards, mail art, bookmarks, paper and supply swaps...pretty much anything anyone can dream up!
Sketchbook peek
I try to have giveaways on my blog a couple of times a year, just to keep things fun!  And as of my birthday...the BIG 4-0!...in April, I am planning to have an Etsy Shop called Studio 791 up and running, giving you an opportunity to purchase my art and crafted items. 
Yard sale treasures
I invite new and old readers alike to browse around my blog, looking at previous posts to check out the kinds of projects I enjoy doing.  You can also take a look at the list of blog labels in the margin to get a sense of what kinds of topics you will read about here. 
One of my first hand-carved rubber stamps
Please leave me a comment to let me know that you have come by, and I look forward to visiting your blog in return!

**********************************************
GIVEAWAY!
Vicki has encouraged the Grow Your Blog participants to host a giveaway as part of the event.  To that end, I will be offering a selection of handmade Valentine embellishments, similar to the ones you can read about in this post.  I will package up 8 varied handmade hearts for you to use on your Valentine's Day cards, packages, scrapbook and journal pages.  Everyone who leaves a comment on today's post has a chance to win, and the winner will be selected on February 1.  Be sure I know your email address as part of your comment, so that I can notify you!  Good luck!

Sunday, January 20, 2013

Hearts, Hearts, Hearts!

As I mentioned before, I've caught the Valentine's Day bug, and have been making all kinds of heart embellishments that can go on cards, in collages, or on journal pages.  I thought I would share three ways to create a variety of Valentine hearts yourself.

I made heart templates in three sizes, the old-fashioned way:  I folded a paper over and drew half a heart, then cut it out so that I would have perfect symmetry.
First, I made postage stamp hearts:
For these, I cut around the template to create a heart-shaped piece of paper, and then glued on the red and pink colored postage stamps to fill the shape.  I trimmed around the edges, and voila!  Simple, simple, and a pretty way to use cancelled stamps.

Next, I used a techniqe I read about in a recent Cloth Paper Scissors eNewsletter to create these torn-paper hearts:
I tore various hand-painted papers into strips (these were all done with acrylic paints), and lightly glued them (with a glue stick) to a large piece of paper.  I used the sewing machine to sew bright thread horizontally and vertically across the strips.  Then I laid the heart templates on the back, used a pencil to outline the hearts, and cut the shapes out.  I went back to the sewing machine to create borders around the hearts. 
Finally, I made torn text-page hearts, using the same basic approach:
I alternated text pages in English, French, and German, and used light-colored thread for the horizontal and vertical stitches.  After cutting out the hearts, I used bright thread for around the edges.
I haven't used all of these hearts yet, but I'm kind of just enjoying them lying around in my work space, inspiring me and keeping me in the Valentine spirit.  After all, we have a whole month before we get to celebrate officially!